
These gorilla trekking photography tips will help you capture the magic of your encounter with mountain gorillas. The forest is dark. The vegetation is thick. Flash is forbidden. You have just one hour. The challenges are real. But with the right camera settings, gear, and mindset, you can take breathtaking photos. Your images will preserve the memory forever.
Gorilla photography is unlike any other wildlife photography. The subjects are close but often in low light. They move. You have no control over the environment. Preparation and practice are essential. This guide covers what you need to know. You will leave with photos that do justice to the experience.
Camera Gear and Settings
A camera with good low-light performance is essential. A DSLR or mirrorless body with a fast lens works best. Use a zoom lens such as a 70-200mm f/2.8. This lets you capture intimate portraits from the required distance. A wider lens like a 24-70mm f/2.8 is useful for showing gorillas in their habitat. Set your ISO high, between 800 and 3200. Open your aperture to f/2.8 or f/4. Use a shutter speed of at least 1/250 to freeze movement. Shoot in continuous burst mode. Gorillas move unpredictably.
In addition, turn off your flash. It is strictly forbidden. Use silent shooting mode if available. The beep of a camera can disturb the gorillas. Shoot in RAW format. This gives you more flexibility when editing later. Gorilla trekking photography tips always start with getting your settings right before you reach the gorillas. You will not have time to fiddle with menus.
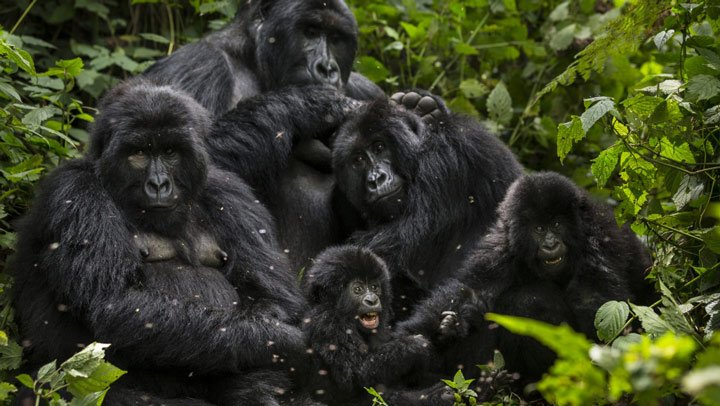
Composition and Light
The forest creates dramatic, dappled light. Use it to your advantage. Position yourself so the light falls on the gorilla’s face. Focus sharply on the eyes. A sharp eye makes the whole image feel alive. Use single-point autofocus. Place the eye on a rule-of-thirds intersection. Include some forest background for context. Show the gorilla in its home. Avoid busy, distracting backgrounds. A shallow depth of field helps blur the foliage.
Moreover, shoot from a low angle. This makes the gorilla look more majestic. Capture interactions. A mother grooming her baby tells a story. Be patient. Wait for a yawn, a glance, a playful tumble. The best images capture behaviour, not just portraits. Gorilla trekking photography tips emphasise storytelling through your lens.
Practical Tips During the Encounter
Keep your camera ready at all times. The gorillas may approach you. Be prepared to shoot quickly. A zoom lens gives you flexibility. You can frame tightly without moving. Respect the seven-metre distance. Your lens bridges the gap. Use a lens hood to reduce flare. The forest light can be patchy. Carry a waterproof cover. Rain can arrive suddenly. A dry bag protects your gear during the trek.
Furthermore, put the camera down occasionally. Absorb the moment with your own eyes. The best photo is the one you take with your heart. But when you do shoot, make it count. Gorilla trekking photography tips advise shooting plenty, but also being present.
After the Trek
Back at the lodge, download your images. Back them up. Edit your RAW files to adjust shadows and highlights. Reduce noise from high ISO. Keep the colours natural. The gorilla’s true hues are beautiful. Share your images responsibly. Tag conservation organisations. Your photos can inspire others to support gorilla protection.
Therefore, prepare your gear and your settings. Use these gorilla trekking photography tips. You will return with images that transport you back to that misty forest and the gaze of a silverback.